
5.1 常用操作
qcow2(QEMU Copy On Write 2)是一种在虚拟化环境中广泛使用的磁盘镜像格式,它也是一种稀疏文件,只占用实际写入数据所需的空间,但长期使用后,即使我们释放了占用的空间,qcow2 文件大小也不会下降,这时可以使用 virt-sparsify 压缩 qcow2 文件,它会使用 0 填充所有未使用的 block,最后再做一次去重压缩。
在 PVE 上可以直接使用 apt 安装 libguestfs-tools,它包含多个 virt- 开头的虚拟机磁盘工具
apt install --no-install-recommends libguestfs-tools
使用方式如下:
virt-sparsify --compress src.qcow2 dst.qcow2
需要注意原始文件 src.qcow2 的 virtual size 大小,默认是在 /tmp 目录下创建一个与 virtual size 大小相同的临时文件,如果 /tmp 目录空间不足,可以修改环境变量 TMPDIR 临时调整位置,如下:
export TMPDIR=/root/tmp
将 tmp 目录临时切换到 root 目录下的 tmp 目录。
使用 virt-customize 命令可以修改 qcow2 系统盘的 root 密码,random 表示生成随机密码,使用 password:密码 可以指定密码
➜  ~ virt-customize -a noble-server-cloudimg-amd64.img --root-password random
[   0.0] Examining the guest ...
[   9.6] Setting a random seed
virt-customize: warning: random seed could not be set for this type of
guest
[   9.6] Setting the machine ID in /etc/machine-id
[   9.6] Setting passwords
virt-customize: Setting random password of root to Rd5FxNPCGnNkvWxd
[  11.6] Finishing off
➜  ~ virt-customize -a noble-server-cloudimg-amd64.img --root-password password:Rd5FxNPCGnNkvWxd
[   0.0] Examining the guest ...
[   4.2] Setting a random seed
virt-customize: warning: random seed could not be set for this type of
guest
[   4.2] Setting passwords
[   6.1] Finishing off
可以使用 qemu-nbd 连接 qcow2 文件到 nbd 设备,直接修改操作系统文件,操作步骤:
- 连接 qcow2 文件到 nbd 设备:
qemu-nbd -c /dev/nbd0 src.qcow2 - 挂载磁盘分区到本地目录,修改文件,然后卸载磁盘
- 断开连接:
qemu-nbd -d /dev/nbd0
qemu-nbd 依赖 nbd 内核模块,可以手动加载 nbd 模块:modprobe nbd
也可以编辑 /etc/modules,添加 nbd
➜  ~ tail /etc/modules
# at boot time, one per line. Lines beginning with "#" are ignored.
# Parameters can be specified after the module name.
...
# nbd
nbd
更新 initramfs 后,系统启动时就会加载 nbd 模块
update-initramfs -u
下面是一个示例:
连接 qcow2 文件到 /dev/nbd0,然后将设备挂载到临时目录
➜  tmp qemu-nbd -c /dev/nbd0 /root/tmp/noble-server-cloudimg-amd64.img
➜  tmp lsblk
NAME         MAJ:MIN RM   SIZE RO TYPE MOUNTPOINTS
...
nbd0          43:0    0   3.5G  0 disk
├─nbd0p1      43:1    0   2.5G  0 part
├─nbd0p14     43:14   0     4M  0 part
├─nbd0p15     43:15   0   106M  0 part
└─nbd0p16     43:16   0   913M  0 part
...
➜  tmp mkdir nbd0p1
➜  tmp mount /dev/nbd0p1 nbd0p1
➜  tmp ls nbd0p1
bin  bin.usr-is-merged  boot  dev  etc  home  lib  lib64  lib.usr-is-merged  lost+found  media  mnt  opt  proc  root  run  sbin  sbin.usr-is-merged  snap  srv  sys  tmp  usr  var
卸载分区后,断开连接
➜  tmp umount nbd0p1
➜  tmp qemu-nbd -d /dev/nbd0
/dev/nbd0 disconnected
通常为了减少安装系统耗时,我们会从网上下载各种 img、raw、qcow2 后缀的文件,作为系统盘导入给虚拟机使用,不过目前 PVE 还未支持在网页执行这样的操作,需要使用命令行导入虚拟磁盘文件。
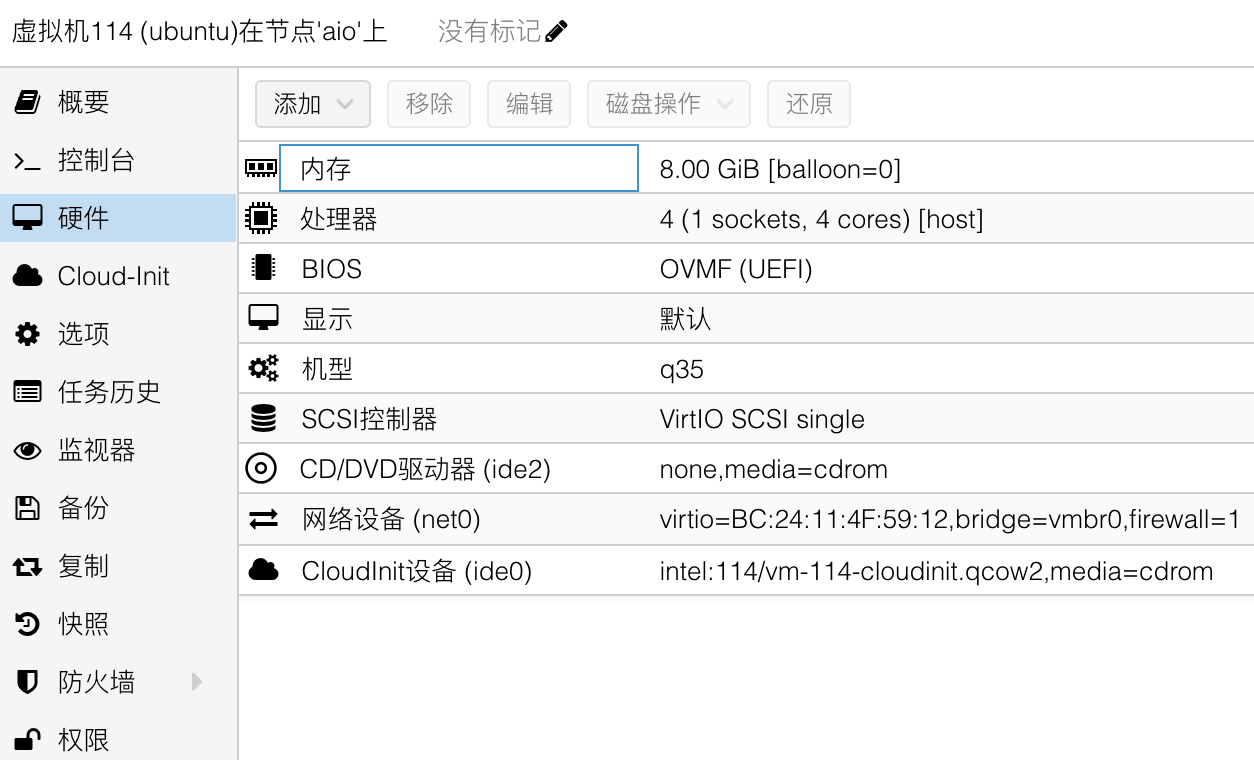
首先创建一台不添加系统盘和 EFI 磁盘的 q35 虚拟机,虚拟机 ID 为 114,这里添加了一个 cloudinit 设备用于初始化系统:
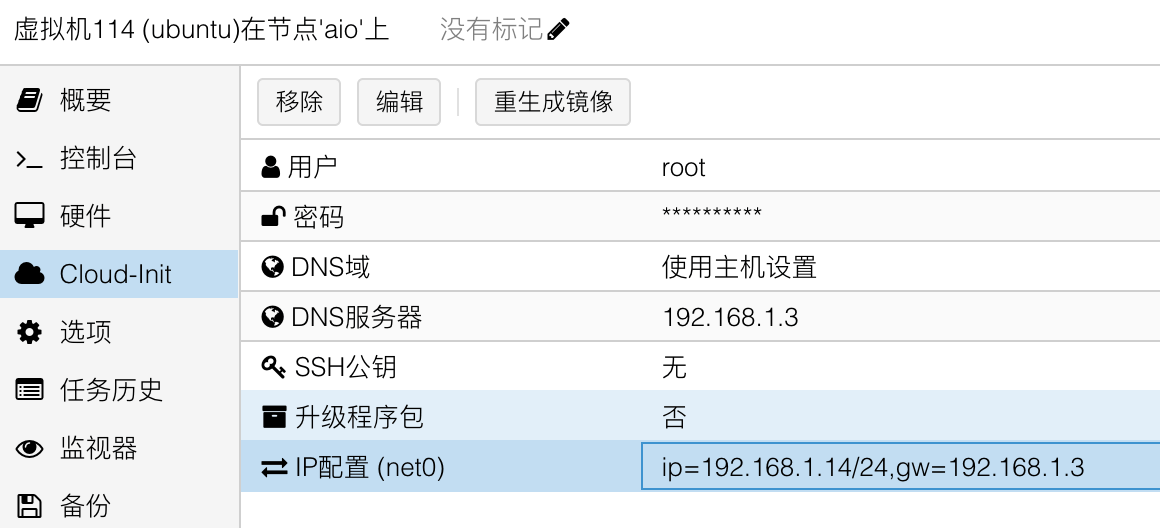
然后修改 Cloud-init 配置,设置用户名、密码和 IP (不升级程序包,避免启动时因为网络问题阻塞),再点击重新生成镜像:
接着登录宿主机,使用 qm disk import 命令导入下载好的系统盘,命令格式为:qm disk import 虚拟机ID 虚拟机磁盘文件 存储
➜  ~ qm disk import 114 /root/tmp/noble-server-cloudimg-amd64.img intel
importing disk '/root/tmp/noble-server-cloudimg-amd64.img' to VM 114 ...
Formatting '/mnt/intel/images/114/vm-114-disk-0.raw', fmt=raw size=3758096384 preallocation=off
transferred 0.0 B of 3.5 GiB (0.00%)
transferred 35.8 MiB of 3.5 GiB (1.00%)
...
transferred 3.5 GiB of 3.5 GiB (100.00%)
Successfully imported disk as 'unused0:intel:114/vm-114-disk-0.raw'
最后在控制台上将导入的磁盘挂载到 scsi0,并增加30G磁盘空间:
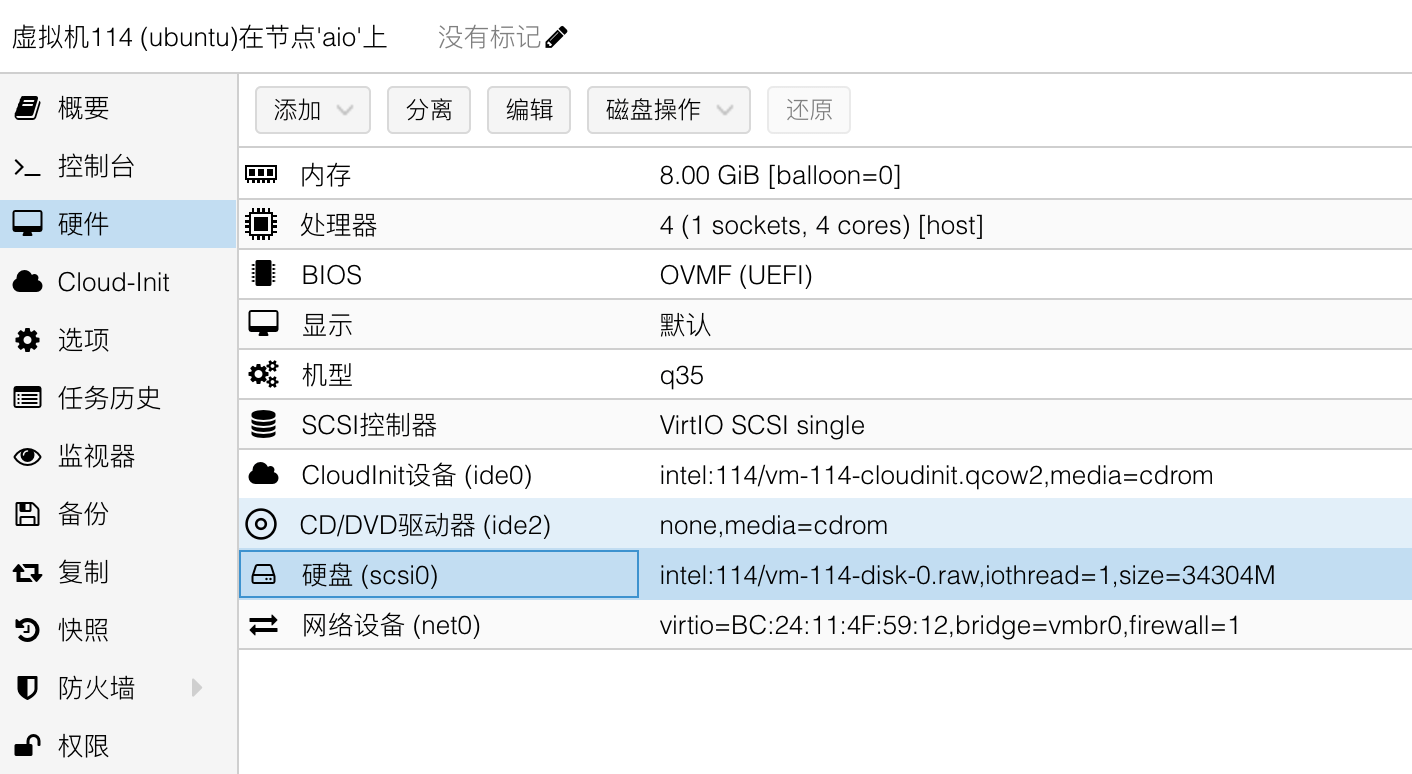
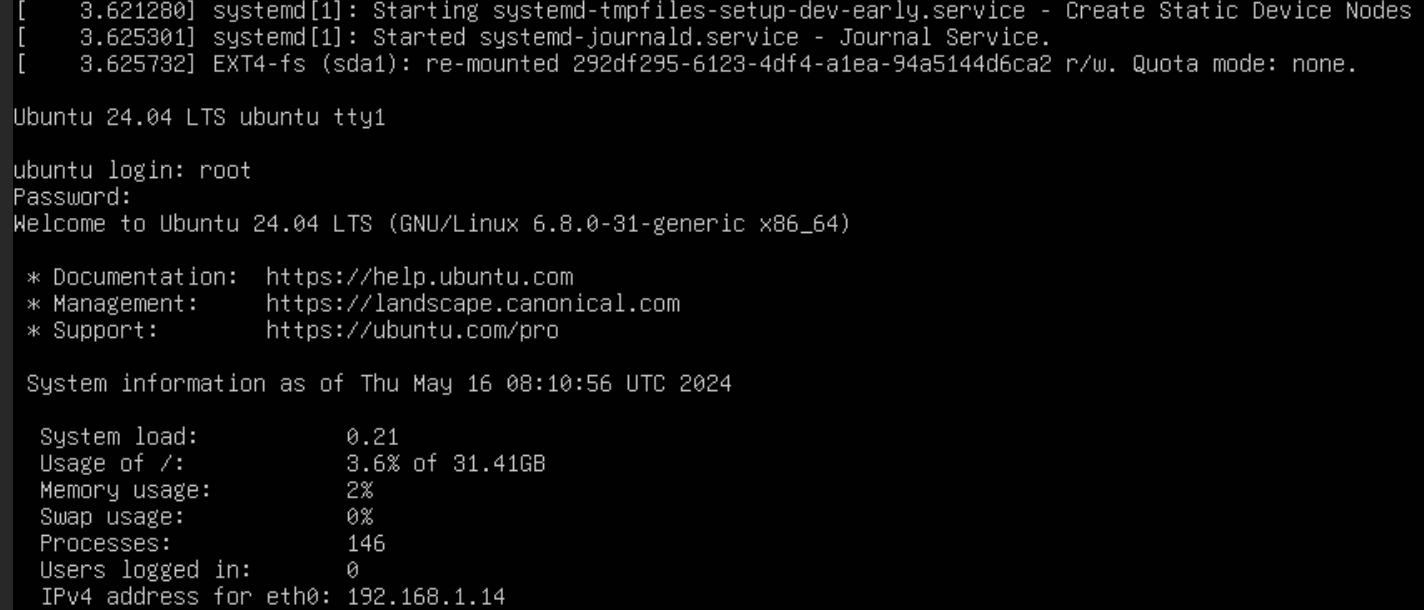
这里还需要在 选项-> 引导顺序 中添加 scsi0,即刚刚创建的系统盘,开机后可以看到系统成功启动,根分区已经完成扩容:
这是一个解决强迫症的操作,从使用上看,swap 文件会使用 4KB 的空间来存储一些基础数据,如果想要创建一个和内存大小完全一致的 swap 文件,可以先用 free -k 获取内存 size,然后使用 fallocate 命令创建一个内存 size + 4KB 的文件

QEMU Guest Agent(QGA)是 QEMU 虚拟化平台中的一个组件,用于增强虚拟机与宿主机之间的通信和交互。QGA 允许宿主机与虚拟机进行双向通信,以便执行各种管理和监控任务。
在 PVE 中开启 QGA 的直接用处就是无需登陆虚拟机便可获取它的内网 IP 展示在概要页面。
首先需要确保虚拟机内已经安装了 QGA,主流 Linux 系统下安装并启用 QGA 的命令如下:
# on Debian/Ubuntu based systems (with apt-get) run:

apt-get install qemu-guest-agent

# and on Redhat based systems (with yum):

yum install qemu-guest-agent

# Depending on the distribution, the guest agent might not start automatically after the installation.
# Start it either directly with

systemctl start qemu-guest-agent

# Then enable the service to autostart (permanently) if not auto started, with

systemctl enable qemu-guest-agent
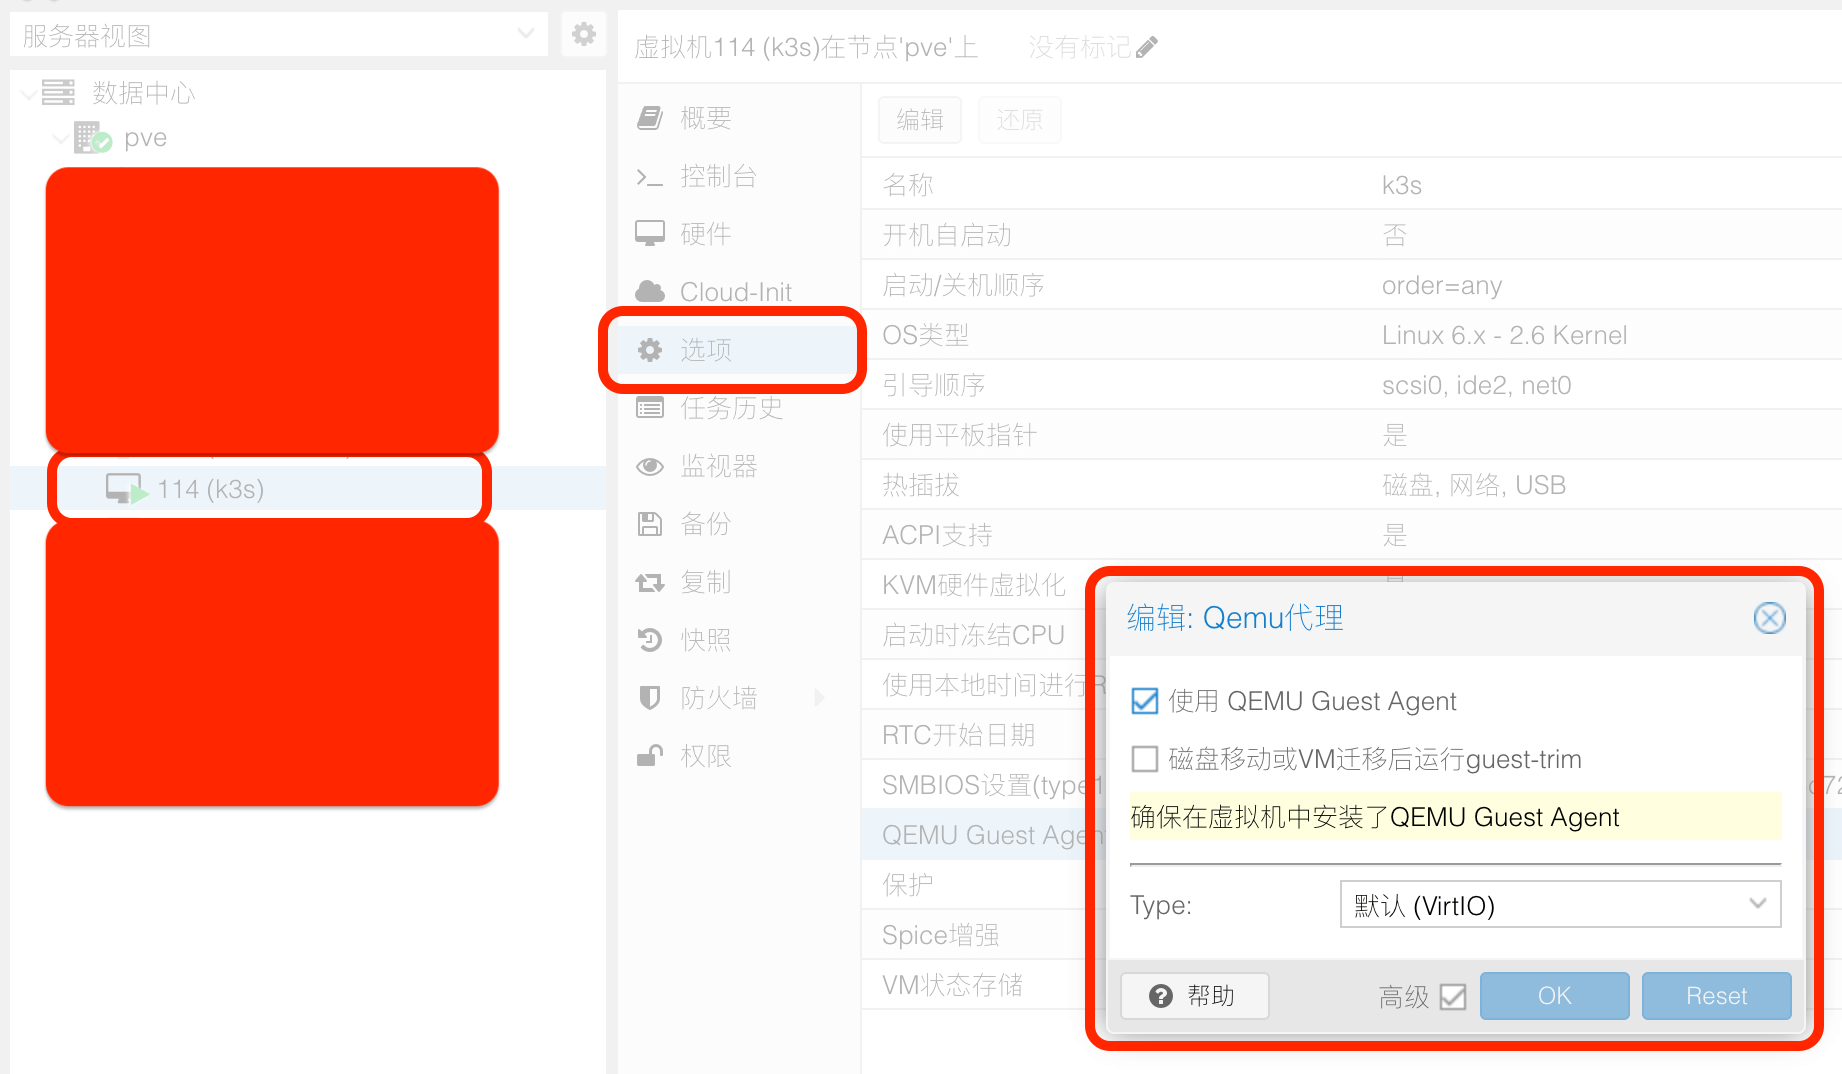
启用 QGA 后,可以在宿主机上进入虚拟机执行命令,控制台上的配置如下:
启用后可以在概要页面看到虚拟机的内网 IP:

一般情况下都是创建虚拟机作为 Server 使用,以下是我常用的配置,主要做了这些调整:
- 开启数据包转发
- 优化 TCP 连接
- 启用 BBR 拥塞调度算法
- 设置文件描述符上限为一百万
- 安装并配置常用软件
/etc/sysctl.d/optimize.conf
# forward
net.ipv4.ip_forward = 1
net.ipv6.conf.all.forwarding = 1

# tcp optimization
net.core.rmem_max = 67108864
net.core.wmem_max = 67108864
net.core.netdev_max_backlog = 250000
net.core.somaxconn = 16384
net.ipv4.tcp_syncookies = 1
net.ipv4.tcp_tw_reuse = 1
net.ipv4.tcp_fin_timeout = 30
net.ipv4.tcp_keepalive_intvl = 75
net.ipv4.tcp_keepalive_probes = 9
net.ipv4.tcp_keepalive_time = 7200
net.ipv4.tcp_max_syn_backlog = 16384
net.ipv4.tcp_max_tw_buckets = 8192
net.ipv4.tcp_mem = 25600 51200 102400
net.ipv4.tcp_rmem = 4096 87380 67108864
net.ipv4.tcp_wmem = 4096 87380 67108864
net.ipv4.tcp_mtu_probing = 1

# bbr
net.core.default_qdisc = fq
net.ipv4.tcp_congestion_control = bbr
net.ipv4.tcp_fastopen = 3

# swap
vm.swappiness = 60
vm.vfs_cache_pressure = 100
vm.overcommit_memory = 1

# file descriptor
fs.inotify.max_user_watches=524288
fs.file-max = 1048576
/etc/security/limits.d/optimize.conf
* soft     nproc          1048576
* hard     nproc          1048576
* soft     nofile         1048576
* hard     nofile         1048576
root soft     nproc          1048576
root hard     nproc          1048576
root soft     nofile         1048576
root hard     nofile         1048576
以 Debian 系统为例,下面的脚本会安装常用软件,启用 oh-my-zsh 与 github.com/amix/vimrc:
apt update && apt install -y curl git zsh htop vim
sh -c "$(curl -fsSL https://raw.githubusercontent.com/ohmyzsh/ohmyzsh/master/tools/install.sh)"
git clone --depth=1 https://github.com/amix/vimrc.git ~/.vim_runtime
sh ~/.vim_runtime/install_awesome_vimrc.sh
cat<<EOF> ~/.vim_runtime/my_configs.vim
set nu
set ts=4 sw=4
syntax enable
EOF